|
BeanMaker v2.10 Copyright ©2000-2006 CyLog Software |
| Introduction | |||
| Quick Guide | |||
| How the engine works | |||
| Writing Templates | |||
| Tutorials | |||
| Registration | |||
| License Agreement | |||
Quick Guide
 Installation
Installing BeanMaker could have not been simpler. Simply extract the contents of the archive you
downloaded and copy them into a folder. BeanMaker will use that directory for it's own configuration file
and you can place your templates and project settings anywhere else. You can also
put the templates and project settings under source control and share them with your whole development team.
Project Configuration
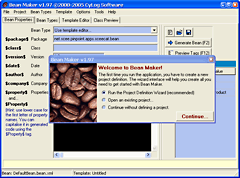
When BeanMaker first start it will greet you with the "Project or Language Definition" wizard. This
tool will help you create your first project configuration. The things you need to set up at this point are:
| Item | Equivalent tags | Description |
| Source Path | $src_path$ | Where your source files will be generated. BeanMaker can create folders when
needed (i.e. java packages). |
| Template Path | $template_path$ | Where all your templates will be stored. This is usually a directory under source-control. |
| Member Variable Prefix | $var$ | The (optional) prefix for member variables (class variables). Some people like to use a special prefix
for member vars, like "f_", "m_", etc. |
| Argument Prefix | $arg$ | The (optional) prefix for method arguments. Some people like to prefix method arguments with
"new_", "a_", etc. |
| Date Format | $date_format$ | The format used for the $date$ tag, that is used for generating the current date. |
| Additional or Derived Project Scoped tags | $....$ | You can define here any static tags like "Project Name", which you can use in your templates.
You can also define "clever" tags that use other tags or regular expression, with unlimited possibilities.
For example, you can define a tag that generates the "\" delimited package path for a java class, based on the
dot-delimited package name (e.g.org.cylog.apps.beanmaker). This is one of the most important of BeanMaker's features,
make sure that you read the detailed tag guide. |
| Type Prefixes | $pre$ | BeanMaker can generate Hungarian-notation prefixes, for any class property. If you use
special prefixes, like "s" for strings, "i" for integers, you can define them here. |
| Title |
- | The title of your project definition |
| Bean Type definitions folder |
- | Where the Bean Type definitions will be stored. This is usually a folder under source-control. |
| Filename | - | Finally, you will be asked to save this project definition. Developers can share the project definition between them, since it can be source-controlled and thus making all of the above settings consistent team-wide. |
The project configuration is stored in an XML file, you may freely edit it if you prefer using a text-editor rather than the wizard interface.
Creating your first template
Go to the Template Editor tab and start writing your first template, or load any of BeanMaker's example templates.
Use the template toolbar to quickly paste the class tags into your template code.
Creating your first class
Go to the Bean Properties tab and enter a package name, a class name and some properties in the form "type name" (e.g. String name).
From the Bean Type drop-down list make sure that you select the "Use template editor..." item.
Press F2 and the generated code will be shown in the Class Preview tab. You can now copy & paste
this code to any file in any text-editor, or save the file and let BeanMaker create the required folder structure
and class file for you (cool!).
Next steps
Learning how to use BeanMaker to its full potential is easy and fun. You'll be amazed at the amount of
time you are saving when generating code with BeanMaker. The next steps in the learning curve are to learn
how to create BeanTypes, associate them with one or more templates and probably define you own custom cool tags.
Use our tutorial lessons if you don't like experimenting by yourself: